A UX Case Study
How might we use Augmented Reality to simplify on-site inspections for field operators?
Project Roles
UX Research
App Structuring and Flows
Low & Hi-Fi Design
Development in Unity
About Tractus SmartSite
Tractus Smart Site is an innovative Augmented Reality application designed to enhance on-site inspections. Users can navigate their environment using advanced scanning capabilities to assess the condition of objects. The app allows users to identify faults, breakages, or defects with precision.
During the Augmented Reality session, users can take notes seamlessly, ensuring thorough documentation of their observations. Additionally, the platform provides a structured checklist of tasks, guiding users through a systematic and efficient inspection process.
During the Augmented Reality session, users can take notes seamlessly, ensuring thorough documentation of their observations. Additionally, the platform provides a structured checklist of tasks, guiding users through a systematic and efficient inspection process.
Goals and Objectives
The project's goal is to design and develop a user-friendly application that allows users, regardless of their technological expertise, to scan hardware objects using Augmented Reality and address any detected defects.
On to the fun bits then.

So who's using this AR tool anyway and why?
We kicked off our user research for Tractus Smart Site with a mix of methods to really get a true understanding on what users want and what's trending in the market.
We started with internal and external surveys that gave us some great insights from different angles and perspective, showing us what users are into. These surveys were key in spotting areas where we could innovate.
Next, we had some brainstorming sessions within the UX team that sparked creative thinking, leading to various feature ideas that we could implement. To make sure we were on the right track, we checked out what competitors were doing, picking up best practices and finding ways to stand out.
This approach helped us add unique touches to our app. Then, we drafted detailed user personas, mapped out the app's structure, and designed user flows to make sure the app gives the user's what they really need.

What do the users want?
1. A simplified user interface
A highly intuitive interface that minimizes the learning curve, allowing users to navigate effortlessly.
2. Guided in-app assistance
Step-by-step instructions that are clear and straightforward, guiding users through the scanning and reporting process without any confusion.
3. Minimal typing
Limited typing requirements, as users may find extensive text input challenging due to gloves and/or accessibility issues. Instead, options for quick selections or voice input are preferred, enhancing accessibility.
4. Incorporation of visual cues
Incorporating visual cues and straightforward indicators to easily assess the status of machinery and the severity of detected issues.
5. Helpful support
Access to clear and concise help resources, along with responsive customer support for any inquiries or issues.
This means, we need to design these major screens...
A. Start Session
_
1. Real time instruction tutorial on how to conduct AR session for first time users
2. Icon to open instructions tutorial for non-first-time users
3. Option for flashlight?
4. Timer for session duration
5. Pause/Play/Stop button
6. Ability to take photos during the session (like in iPhone camera app)?
7. Ability to take notes around a detected object
8. Real time checklist notifications and button to view checklist items
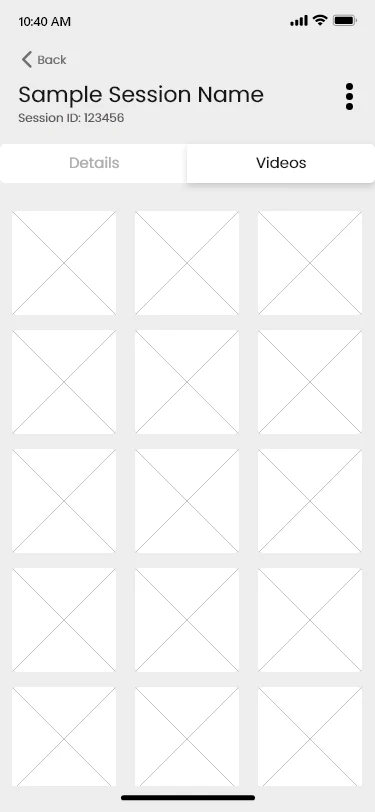
B. Previous Sessions
_
1. Scrollable list of previous sessions with session name and date stamp
2. Clicking on session will show details of that session
a. Ability to access folder containing video recordings from the session:
i. Save video
ii. Upload video
iii. Send videos
3. Details may be exported as a report in PDF format
4. Ability to send report via email and other options or direct to supervisor in admin dashboard
C. Login Page
_
1. Username and Password entry fields
2. Forgot Password
a. Recover through call
b. Recover through email
c. Above points depend on company policy
3. No Signup needed, password will come from company directly
a. If company policy wants, then signup page will also be made with fields of email, name, password, retype password
2. Forgot Password
a. Recover through call
b. Recover through email
c. Above points depend on company policy
3. No Signup needed, password will come from company directly
a. If company policy wants, then signup page will also be made with fields of email, name, password, retype password
D. Settings
_
1. Logout
2. App UI tutorial
3. AR Session tutorial
4. AR Session settings
a. Video record quality
b. Information user wants to be saved in session reports and logs
5. Customer helpline
6. Privacy policy
7. Terms and Conditions
2. App UI tutorial
3. AR Session tutorial
4. AR Session settings
a. Video record quality
b. Information user wants to be saved in session reports and logs
5. Customer helpline
6. Privacy policy
7. Terms and Conditions
E. Homepage
_
1. App UI tutorial
2. Buttons for
a. Settings
b. Previous Sessions
c. Start a session
d. User Profile??
2. Buttons for
a. Settings
b. Previous Sessions
c. Start a session
d. User Profile??
F. Onboarding Screens
_
1. Explain the features of the application. 2. Cards with a slider and illustrations.
How would the user flow look like?

Getting my hands dirty with design...
Jumping into the design process, we played around with tons of ideas for the product, aiming for a smooth and user-friendly experience. We kicked things off with some rough sketches on paper, then moved to digital wireframes, and finally polished them into high-fidelity designs. Each step was a chance to tweak and product the desired user experience and interface.
First we made some sketches on paper.

Then we made some digital wireframes.


Which were then made into hi fidelity designs and prototyped.
Leveraging the foundational paper and digital wireframes, the User Interface was designed using Adobe XD. This process involved integrating user feedback to refine the design, ensuring it met the needs of our target audience.
A key focus was placed on optimizing the interface for tablet and landscape mobile orientations, recognizing the importance of these formats for on-site inspections. This strategic decision was driven by the need to provide a seamless and intuitive user experience, allowing users to interact with the application effortlessly in various environments.
A key focus was placed on optimizing the interface for tablet and landscape mobile orientations, recognizing the importance of these formats for on-site inspections. This strategic decision was driven by the need to provide a seamless and intuitive user experience, allowing users to interact with the application effortlessly in various environments.


Oh, then I also made the logo.
I then meticulously crafted a sleek and simple logo using Adobe Illustrator, aiming for a minimalist design that conveys clarity and simplicity.


Developer Handoff and Review
After completing the prototype design, we moved into the development phase using Unity 3D.
This transition required me to become familiar with Unity 3D and utilize its codebase to develop the application's front end. It was a valuable learning experience where I not only implemented the design but also expanded my skills to include front-end development.
This collaborative effort between design and development in Unity 3D transformed the initial prototype into a functional and interactive Augemented Reality application.

Custom Made UI Kit
Color Palette
Primary
#252860
#252860
Success
#8EC42A
#8EC42A
Warning
#EA4B2E
#EA4B2E
Info
#FDCF5D
#FDCF5D
Checklist
#3A75AF
#3A75AF
Components

Typography
Poppins Bold
Poppins Medium
Poppins Regular
0 1 2 3 4 5 6 7 8 9
Aa Bb Cc Dd Ee Ff Gg Hh Ii Jj Kk Ll Mm Nn Oo Pp Qq Rr Ss Tt Uu Vv Ww Xx Yy Zz
Aa Bb Cc Dd Ee Ff Gg Hh Ii Jj Kk Ll Mm Nn Oo Pp Qq Rr Ss Tt Uu Vv Ww Xx Yy Zz
